Underwater Morphing Beads

Overview
How might we create an ocean garden of our own? This is a beginner-level DIY guide for the introduction of morphing matter. With our method, anyone can design and fabricate custom hydrogel-based underwater morphing structures.
💡This page contains all the information you need to get started. If you are interested in more in-depth/technical details, you may check out this video and an academic paper and conference presentation published by Morphing Matter Lab at Carnegie Mellon University.
Materials and Tools You Need
Mandatory
Vellum paper (purchase link)
Hydrogel beads (purchase link)
Jewelry tweezer (purchase link)
Superglue (such as this Loctite, link)
Scissor
A small clear water tank (such as small fish tanks, plastic see-through bins, or even a glass bowl as long as it is big enough for the artifacts you are going to make) (such as this plastic bin, link)
Optional
A digital paper cutter or laser cutter: for digitally cutting complex shapes out of paper (such as this paper cutter, link)
A tripod for holding your phone and video documentation (purchase link)
A lightbox photobooth (purchase link)
Temperature probe (purchase link)
💡For many items, the supplier/brand and link are just suggestions to help you find things. You may use parts or suppliers that are cheaper and/or easier to obtain.
Computational Design Tool
For advanced design practice, you can also try designing the shapes with our computational design and simulation tool.

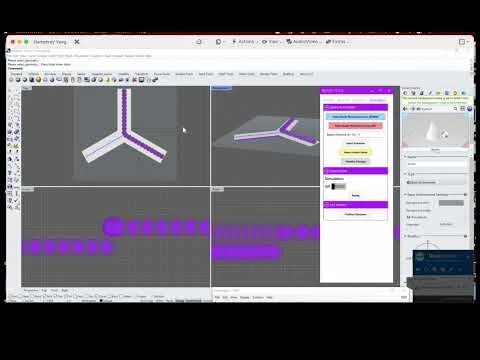
(a) Set outline; (b) generate branch pattern; (c) adjust the branch pattern by choosing different types of branches; (d) specify branch density; (e) specify width of the branch; (f) set end roundness of branch; (g) define actuator region and assign actuators; (h) adjust maximum bending angle through distances between adjacent beads; (i) simulate morphing effect.
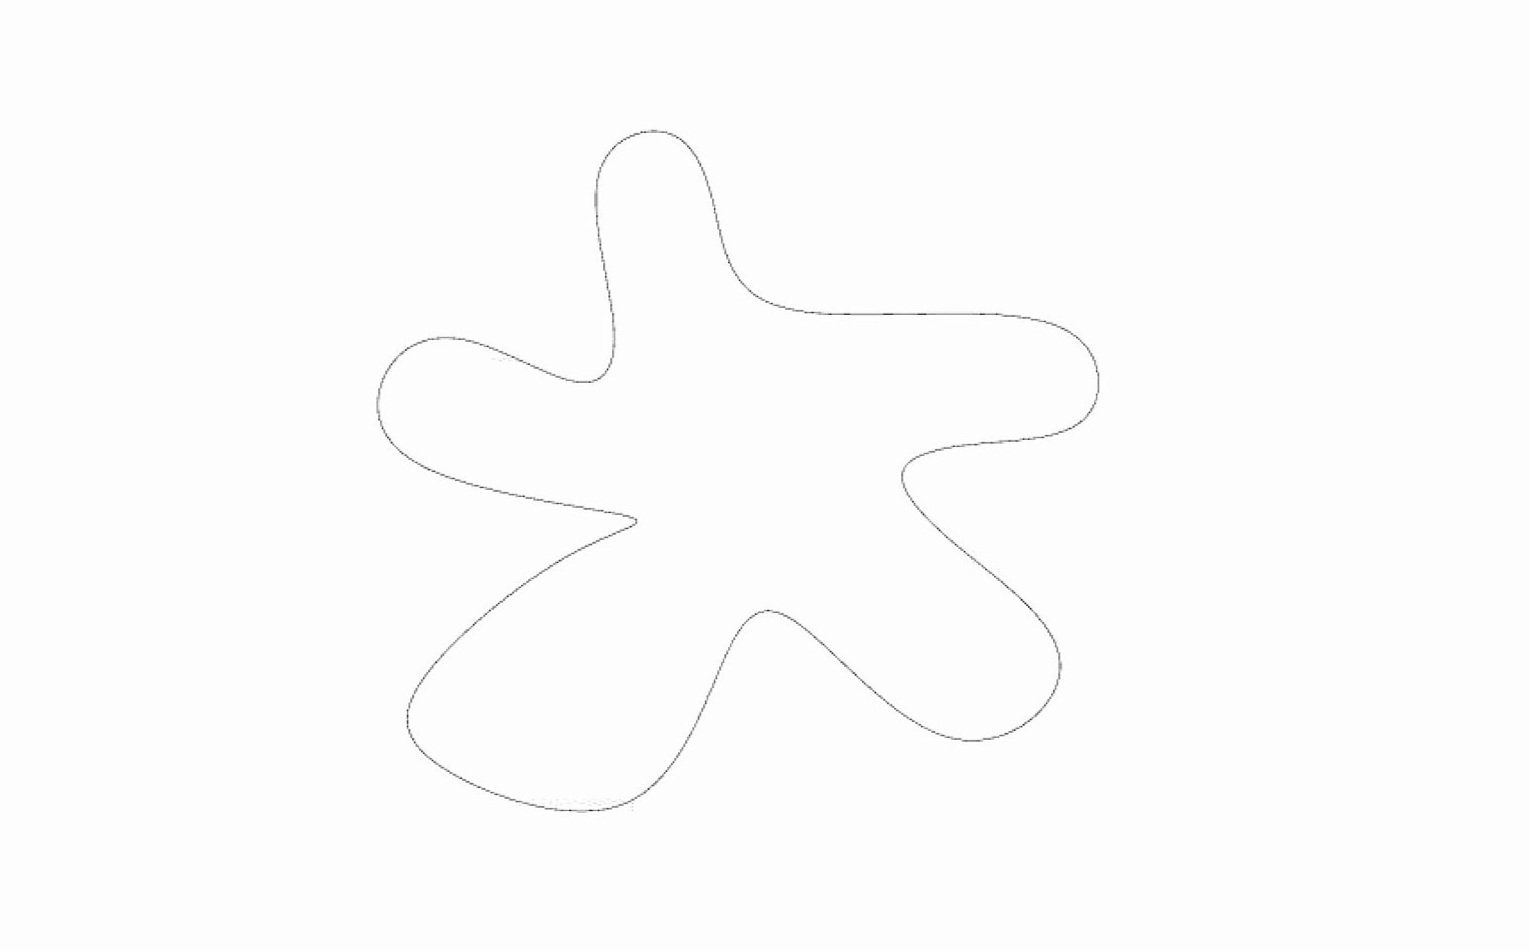
Step 1 - Set Outline
In the computational tool, select a basic outline from the library or draw a closed outline from scratch.

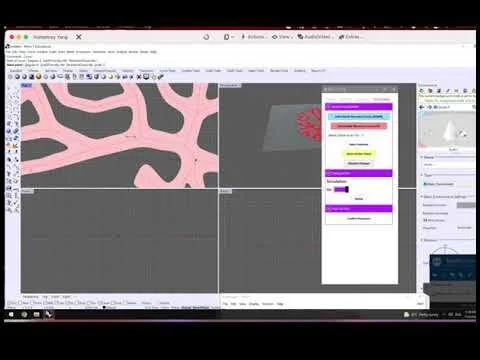
Step 2 - Generate Branch or Kirigami Pattern
Generate branches that will fill the outline automatically, or define the outline of your cut locations by hand.
💡 See how the patterns change as you adjust features such as branch density and branch width or cuts distance and gap adjustment.

Step 3 - Define Actuator Region and Assign Actuator
Specify the layout of the beads by drawing polylines to indicate which branches or regions to actuate. Beads are generated along those actuation lines.

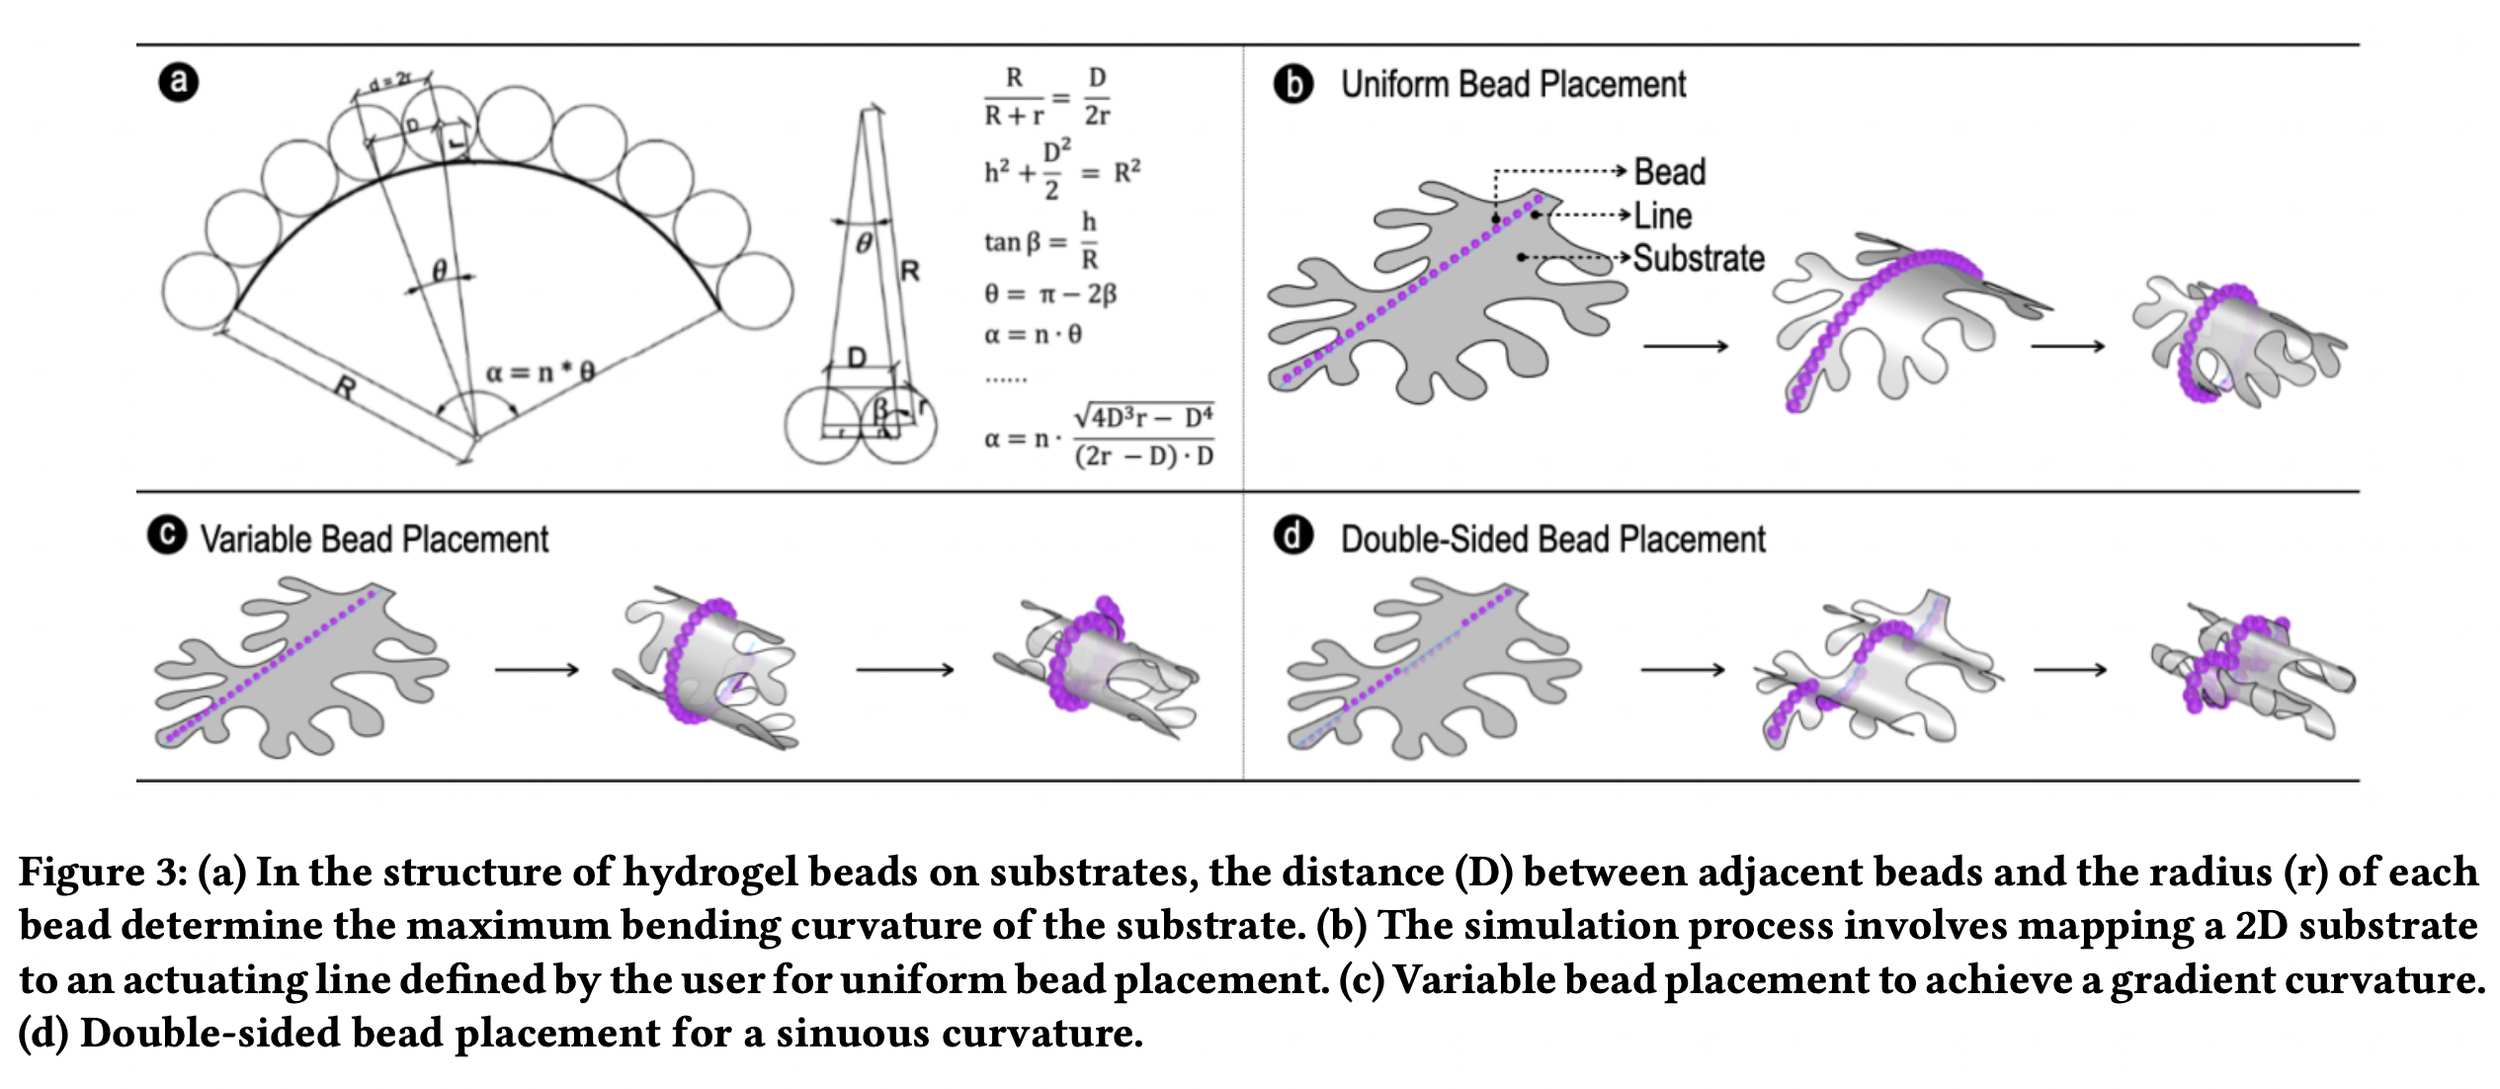
Step 4 - Adjust the Distance Between the Beads
Adjust the distance between each adjacent bead, which will affect the maximum bending curvature of the corresponding line.
You can also select and change the side of the substrate on which the selected beads will reside.

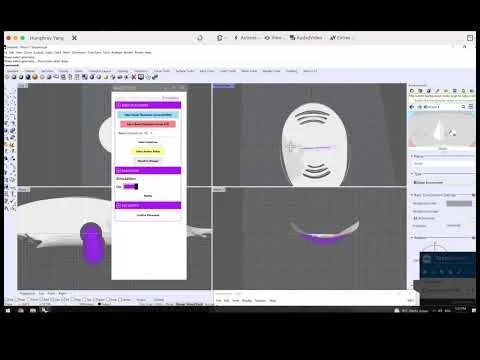
Step 5 - Simulate the Morphing Effect
Simulate the transformation i.e., the morphing behavior.
💡 Not the shape you wanted? Try to go back to the previous steps to adjust your design.

Step 6 - Export Design and Mark Bead Locations
Export the outline of the vellum paper designed in the computational tool for laser cutting and export a .pdf file as a reference for bead placement and adherence to the vellum paper.
Using the digital files generated through the computational tool, cut the designed pattern on a gateway paper and mark the bead locations with a CNC plotter (Curio, Silhouette America) in two sequential steps.

Step 6 - Glue Hydrogel Balls
Apply a very small quantity of cyanoacrylate glue to the paper using a glue dispenser tip, just enough to hold a hydrogel ball.
Place the hydrogel balls with tweezers for precision. Applying a very small quantity of cyano-acrylate glue in a discrete manner at each contact spot to maintain the flexibility of the substrate.
(If the glue is applied in a continuous line, the substrate becomes hard and stiff, acting as an additional constraint and reduces the efficacy of the bending behavior.)
Step 7 - Wait for the Transformation!
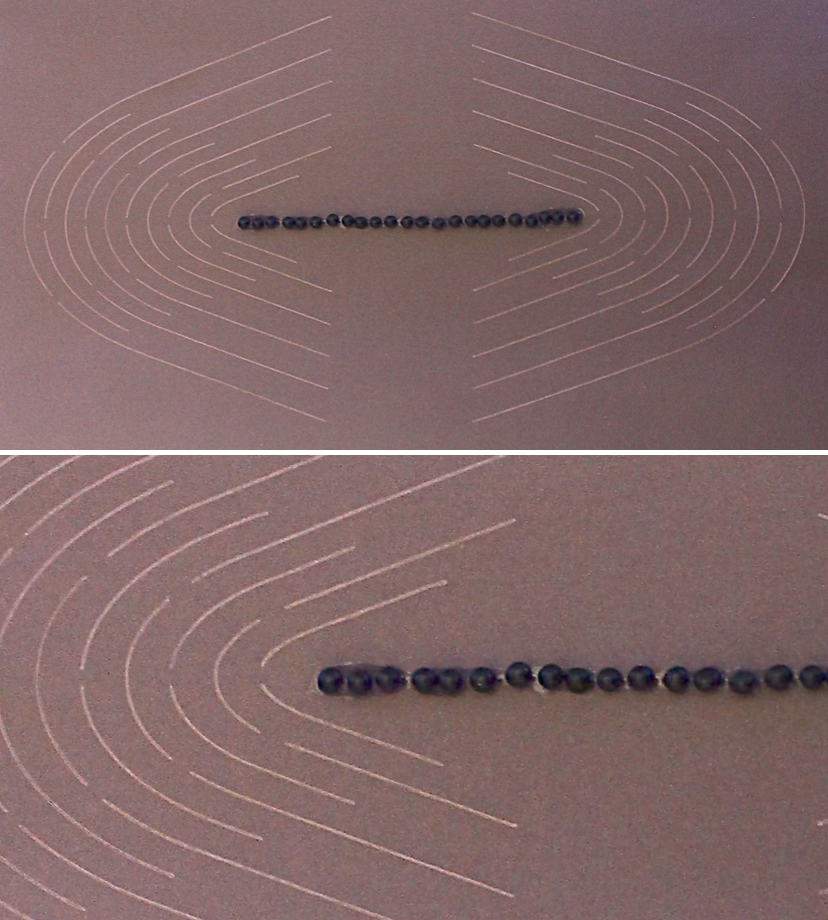
Deploy the created shape into a water tank. The full transformation happens in ~12 minutes!
(If your shape has cuts or branches that are close together, rounding out the edges of the paper with your finger or a Q-tip will prevent the shape from snagging.)
Video tutorials
There are three major functional blocks, including Present Shapes, Branches and Kirigami. You may check out the video tutorials below.
Computational Design Tool Frequently Asked Questions
-
If you can’t attach beads to your branch or kirigami shape, it is likely that you forgot to draw the lines inside your baked shape. Make sure to turn off the preview option to see what the simulator is actually registering. If the lines you are trying to apply beads to disappear when you turn off preview, you may need to use the polyline tool to draw the lines yourself.
-
You can try to select each of the baked curves one by one and delete them until there is only one ‘curve’ option that pops up when you select the outer line. Otherwise, you can go back to the non-simulator tabs (Preset, Branch, Kirigami), copy your shape so that you have a backup, and delete all the baked curves.
-
To export your file to a PDF, use the ‘Print’ option in Rhino. From there, there should be an option to adjust the window size or the view of the printer. If you choose that option, you will be able to adjust the printing window such that only the template is visible. When you return to the printing window, you can choose to save your file as a PDF using a dropdown menu in the lower-left corner.
-
To export your template to a paper cutter, you can first export your template in PDF format. Then, move your template to a paper cutter compatible software (i.e. Silhouette for Curio). You may need to convert from PDF to PNG first.
Fabrication Steps

Step 1 - Design your own template or print out our digital templates
Download this pdf to access our recommended sample shapes. You can print the patterns on normal paper and transfer them to the vellum by hand, or print directly on the vellum if your printer can handle it.

Step 2 - Cut each shape out
Cut each individual shape with a scissor or paper knife by following the black outline. The purple dots are for the next step; you can ignore them for now.
💡 If you have a paper plotter or laser cutter, you can use these machines to make a more precise cut.
📄 Don’t have a paper cutter? See this document for tips on how to transfer complex patterns from printer paper templates to vellum.
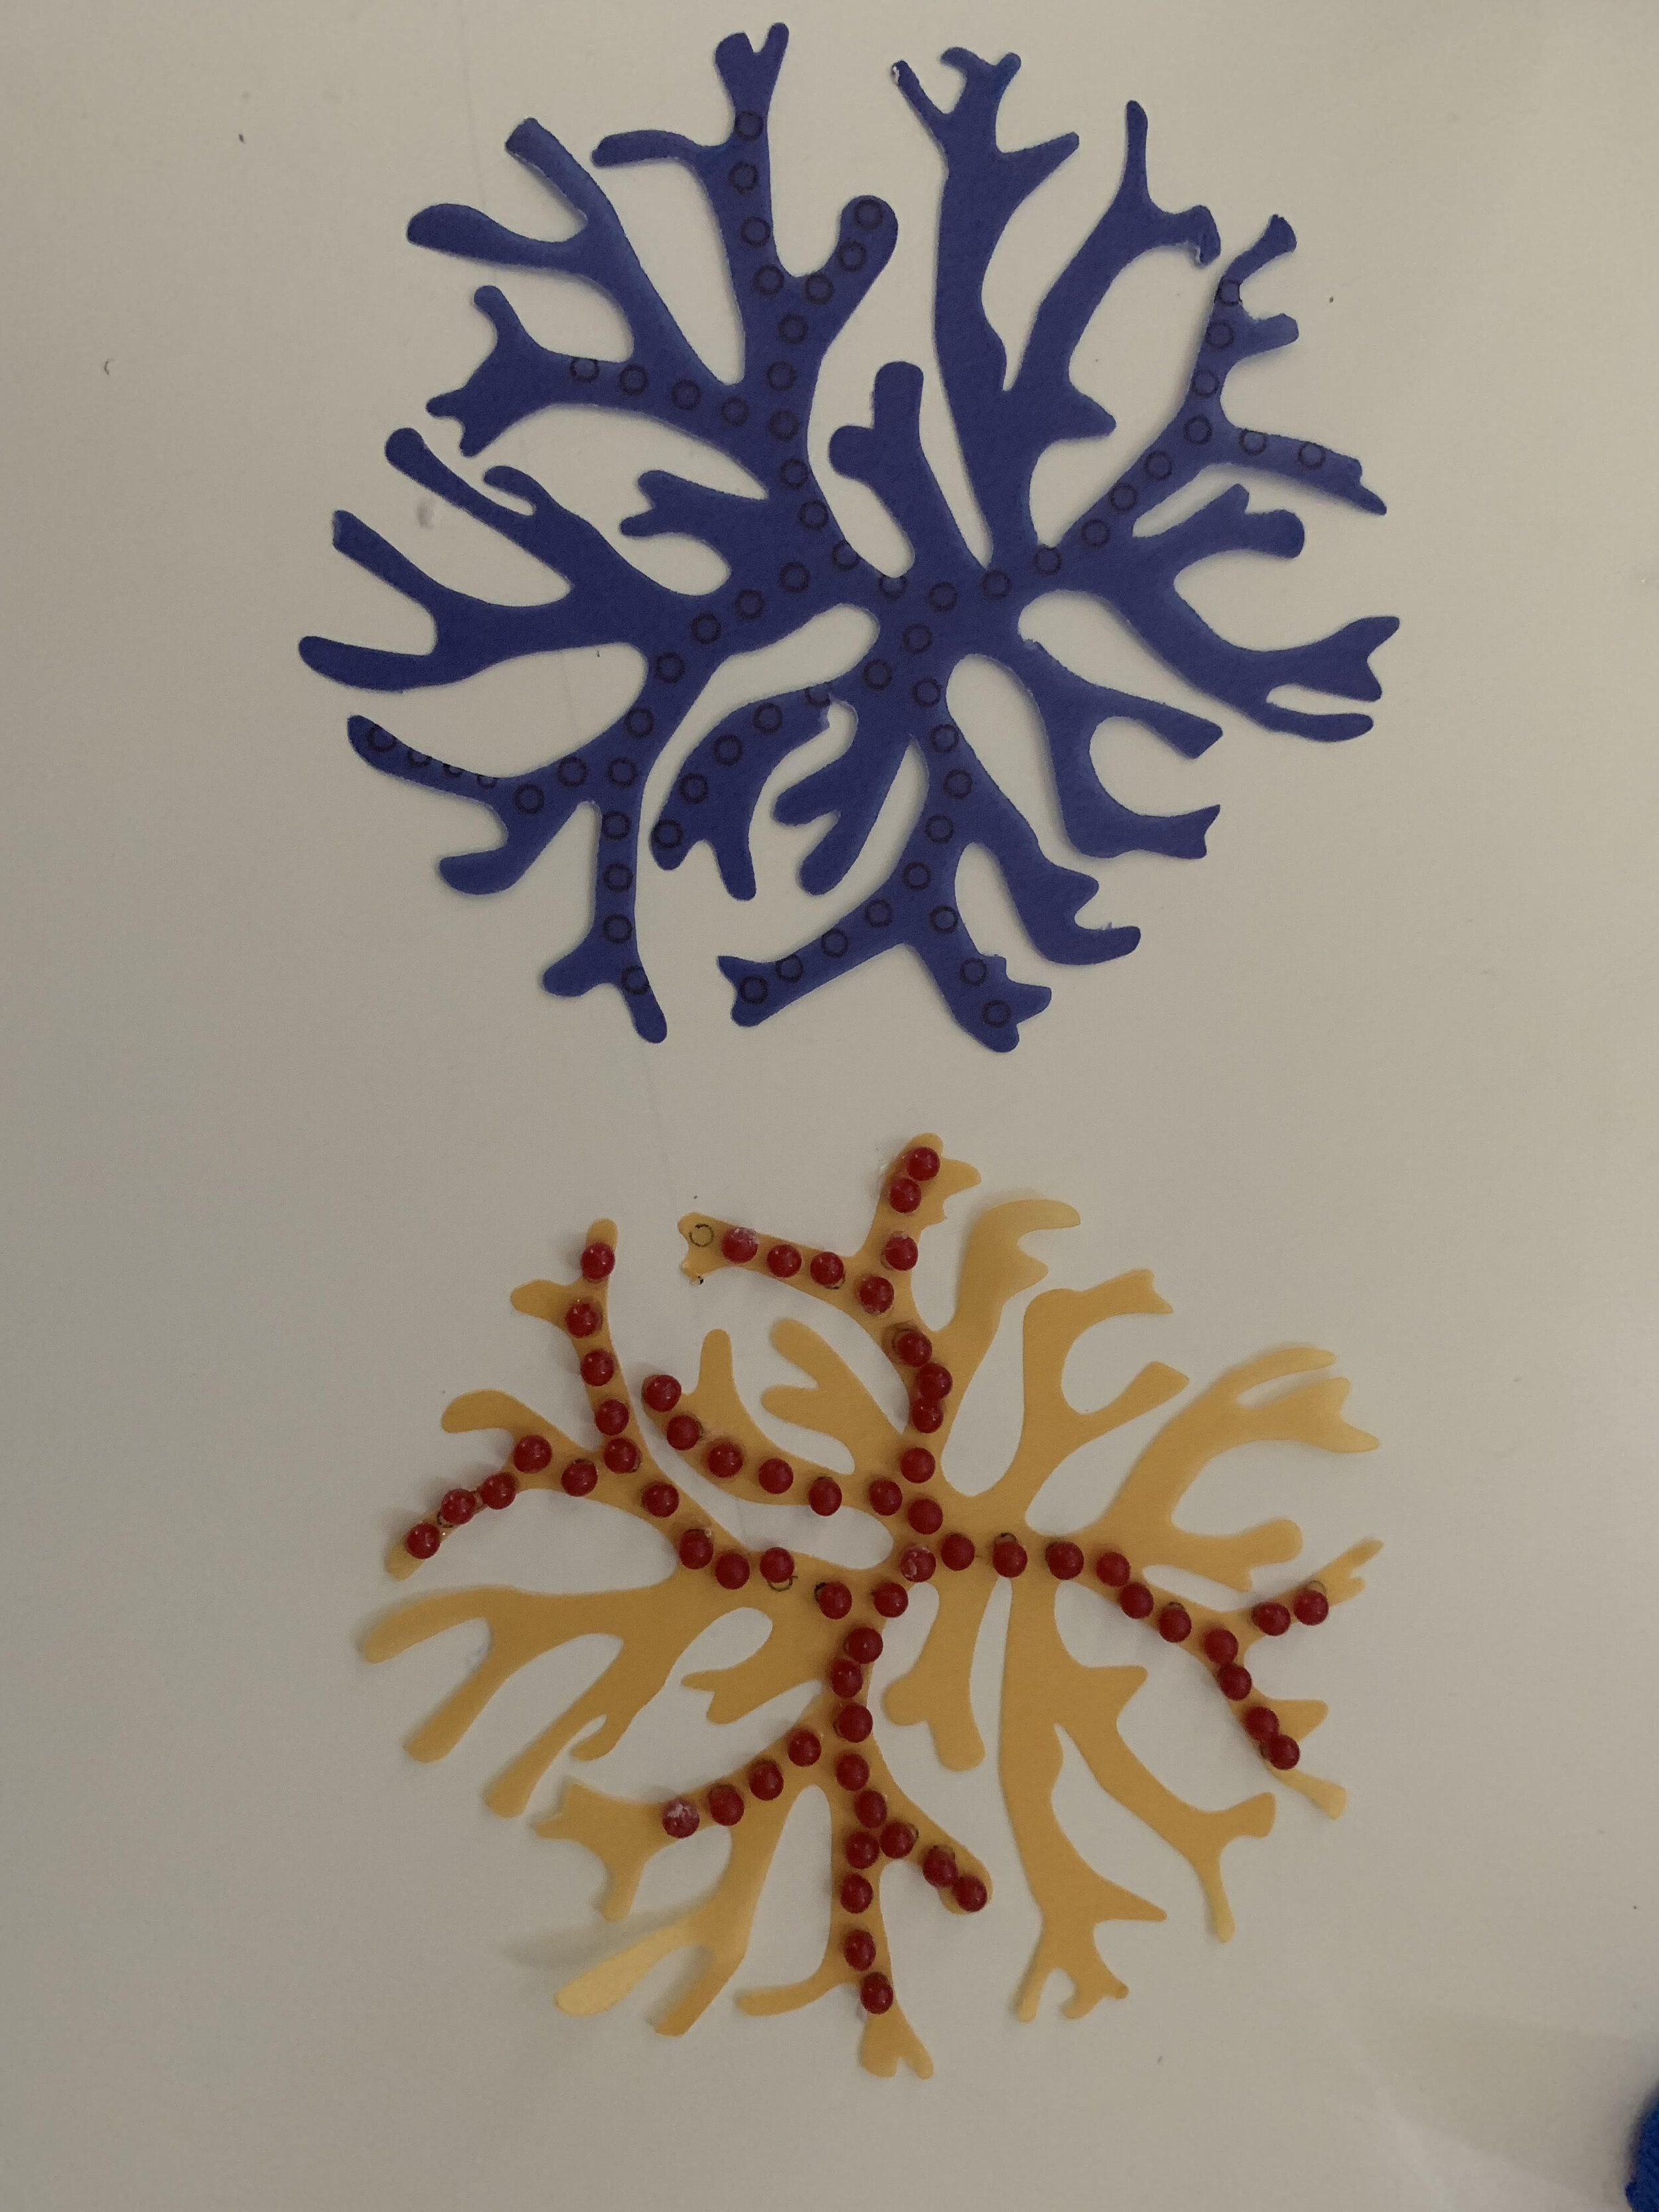
Step 3 - Glue the beads
Following the purple dots on the paper, put one drop of glue for each bead and place one bead on each purple dot. Attach the beads one by one using the tweezers. Make sure the beads are firmly attached and do not fall off easily.
⚠️ Do not put superglue in a continuous line. This makes the paper stiff and affects the overall morphing. Try to dot the glue on the paper first and then drop the beads onto the paper one by one.
💡 Since super glue dries fast, put 5-6 glue dots in one go and attach beads.
🎥 Need more tips for gluing beads? Check out this video (also found at the bottom of the page) for a demonstration.

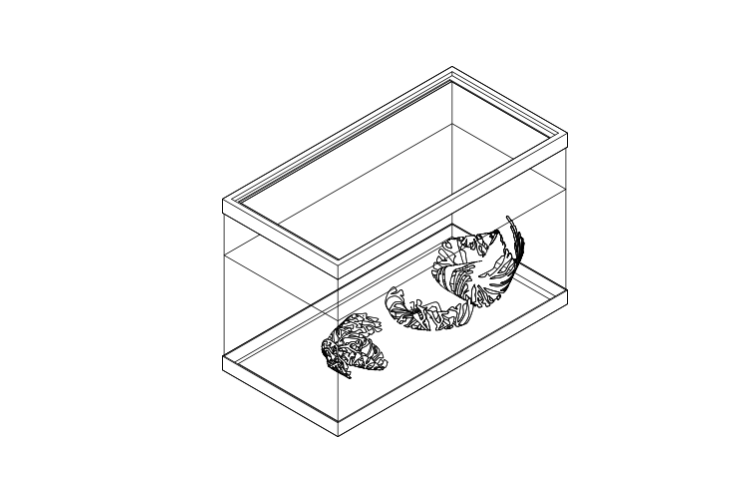
Step 4 - Place underwater
Fill a water tank (such as a small fish tank) with cold or warm water (lower than 30 C / 86 F). Place the paper structure you just made into water.
💡 Warmer water (but not higher than 30 C / 86 F) will make it morph faster than colder water.

Step 5 - Wait for the transformation to happen
The flat paper structure will start to self-fold after a few minutes and reach its maximum folding state in about 20 minutes.
💡 Some kirigami shapes may need to be pinned down at the corners to fully actuate
🎥 Need more tips for video documentation process? please check out this video on ’ How to Shoot Hydrogel Beads Transformation with Time-Lapse ’ (also found at the bottom of the page.)
Project Examples